







Watercolor has a reputation problem. It is seen as the fussy medium — the one that punishes mistakes, blooms unexpectedly, and dries lighter than you planned. Beginners buy a beautiful set of paints, watch a few mesmerizing videos, attempt a sunset, and produce something that looks like a muddy accident. Then they conclude they “just aren’t artistic.”
That conclusion is almost always wrong. What failed was not the painter — it was the instruction. Watercolor is genuinely technical: it rewards people who understand washes, timing, and water control, and it humbles people who wing it. A good course teaches those mechanics plainly. A bad one films pretty paintings while explaining nothing. This guide shows you how to tell the difference, which supplies actually matter, and how to practice so the medium starts cooperating.
What separates good watercolor courses from bad ones
After looking closely at what online watercolor classes actually teach — and what they conveniently skip — the same criteria separate the courses worth your time from the ones worth skipping:
✅ The good ones teach water control before painting
Watercolor is water management with pigment along for the ride. The best courses spend real time on the unglamorous fundamentals: how wet the paper should be for a flat wash versus a graded wash, how to judge the “sheen” moment, how much water belongs on the brush. If a course jumps straight to painting a landscape in lesson one, it is entertainment, not education.
✅ They explain why, not just what
“Now I add burnt sienna here” teaches you to copy one painting. “I am adding a warm transparent color while the wash is damp so it diffuses softly” teaches you to paint anything. Look for instructors who narrate their decisions — the thinking is the curriculum.
✅ They show the ugly middle stages
Every watercolor painting passes through a phase where it looks terrible. Instructors who edit that out — or whose demos look effortless from first stroke to signature — leave you believing your own awkward middle stages mean you are failing. The honest teachers show the mess and talk you through it.
✅ They teach color mixing, not color collecting
A course that sends you shopping for forty tubes is selling supplies, not skill. The strong ones teach you to mix clean greens, convincing greys, and glowing skin tones from a limited palette — because that knowledge transfers to every painting you will ever make. Our guide to choosing a course without wasting money applies here: curriculum clarity beats instructor charisma.
🚩 Red flags: what to avoid
- “No drawing skills needed!” as the whole pitch. Tracing is fine, but courses that never address drawing leave you dependent forever.
- Only real-time paintings with music. Lovely to watch, nearly useless to learn from. Instruction requires talking.
- Gear-heavy supply lists. If lesson one requires $200 of specific brands, the course is monetized through affiliate links, not teaching.
- No exercises, only finished paintings. Without drills — washes, gradients, color charts — you accumulate paintings, not skills.
- The instructor never makes mistakes. In watercolor, that means they are hiding them, and you are not learning recovery.
Supplies that actually matter (and what’s hype)
Art stores profit from beginner confusion. Here is the honest breakdown:
| Supply | What matters | What is hype |
|---|---|---|
| Paint | Artist-grade beats student-grade — pigment load changes everything. But you need 8–12 colors, not 48. | Enormous sets. A limited palette mixes better and teaches more. |
| Paper | This matters MOST. 100% cotton, 140 lb / 300 gsm. Cheap paper buckles, pills, and fights you — it is the #1 cause of beginner misery. | Fancy blocks and brand prestige. Any reputable cotton paper works. |
| Brushes | One good round brush (size 8–12) handles 80% of beginner work. It should come to a fine point and hold water. | Dozen-brush sets. You will use three of them. |
| Palette | Any white ceramic plate or tile. Mixing space matters; material does not. | Expensive porcelain palettes with lids (nice, not necessary). |
If you remember one thing: upgrade your paper before your paints, and your paints before your brushes. Beginners almost always do the reverse, then wonder why their work looks dull. A $5 sheet of cotton paper will improve your painting more than a $50 brush. For setting up a dedicated corner for all this, setting up a home study space on a budget has transferable ideas.
A practice routine that actually works
Watercolor punishes dabblers and rewards routine — but the routine can be small. Thirty minutes a day beats a five-hour Sunday session, because watercolor timing is a physical sense that fades between long gaps. Here is a weekly structure drawn from the better courses:
- Days 1–2: Washes and drills (15–30 min). Flat washes, graded washes, wet-on-wet gradients. Boring? Yes. This is scales for pianists — and it is what makes later paintings possible. Building a learning habit that sticks has tactics for the days motivation vanishes.
- Days 3–4: Color mixing charts. Mix every color with every other color. Label them. This single exercise — done once, kept forever — becomes your personal reference library and ends the “what makes a good shadow green?” guessing.
- Days 5–6: Small studies. One apple. One cup. One leaf. Small, low-stakes, finishable in a sitting. Small studies teach composition and value without the pressure of a “real painting.”
- Day 7: Play or rest. Experiment with salt textures, cling film, lifting — or take the day off. Rest is part of practice.
Keep everything, including the disasters. Date the back of each sheet. In three months you will have a flip-book of progress that no course testimonial can match — and reviewing old work is one of the most effective learning techniques there is, as our guide to reviewing what you learned explains.
How to tell you are actually progressing
Watercolor progress is sneaky — it does not feel linear. Watch for these real milestones rather than chasing “good paintings”:
- Your washes go down even, without streaks or hard edges you did not plan.
- You start seeing values — light, mid, dark — before you see colors.
- You plan the whites instead of discovering too late that you painted over them. (The paper is your white paint; protecting it is a core watercolor skill.)
- You can rescue a bloom instead of abandoning the painting.
- Your muddy colors become clean mixes — fewer pigments per mixture, cleaner water, more decisive brushwork.
If months pass with none of these shifting, the problem is usually the course, not you — knowing when to quit a course is a legitimate learning skill. And if you find yourself drawn to three-dimensional color work too, floral design courses pair beautifully with watercolor florals.

Troubleshooting: the five problems every beginner hits
Bookmark this section. You will need it, and each of these has a straightforward fix:
- 1. Muddy colors. The classic beginner complaint. Causes: mixing too many pigments, a dirty water jar, or overworking an area. Fix: limit mixtures to two or three pigments, rinse your brush often (keep two jars — one for rinsing, one for clean water), and lay the color down decisively instead of scrubbing.
- 2. Unwanted blooms and backruns. Those cauliflower-shaped blossoms appear when wet paint meets a damp — not wet — area. Sometimes they are happy accidents; when they are not, the fix is timing. Either work fully wet (paint into a shiny wet wash) or wait until the sheen disappears before adding the next layer.
- 3. Buckling paper. Almost always means the paper is too light or not cotton. Short-term fix: tape all four edges down with gummed tape so it dries flat. Long-term fix: 300 gsm cotton paper, as the supply table above insists.
- 4. Colors drying lighter than expected. Watercolor dries noticeably lighter — everyone is surprised the first time. Fix: mix your colors one step darker and more saturated than your target, and test every mix on scrap paper first. The test swatch habit saves more paintings than any technique.
- 5. Overworking. The urge to “fix” a passage by adding more strokes, which lifts the underlying layers into mud. Fix: learn the hardest watercolor discipline — walking away. Let it dry completely, then decide with fresh eyes whether it needs another glazed layer or was actually fine.
A course with a real troubleshooting library — video answers to exactly these problems — is worth more than one with twice the painting demos. When evaluating options, search the curriculum for words like “fix,” “rescue,” and “mistakes.” Their presence is a green flag.
Styles and subjects: find your lane
Watercolor is not one thing. Courses tend to cluster around a few traditions, and knowing which appeals to you helps you choose:
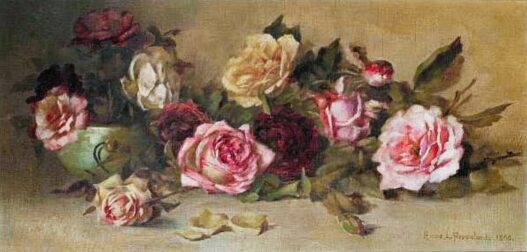
- Loose and expressive — wet-on-wet florals, atmospheric landscapes. Forgiving, joyful, and the most popular beginner style.
- Botanical and detailed — precise, layered, meditative. Slower to learn, stunning results.
- Urban sketching — quick ink-and-wash scenes from life. Portable, social, and wonderfully imperfect by design.
- Portrait and figure — the advanced summit. Skin tones in watercolor are genuinely hard; save this for year two.
There is no hierarchy here — only fit. The loose floral painter and the botanical illustrator are doing equally real watercolor. Pick the style that makes you want to pick up the brush, because desire is the fuel that survives the muddy phase.
The bottom line 🎨
Watercolor is not the impossible medium its reputation suggests — it is the technical medium, and technical can be taught. The courses worth your time teach water control before pretty pictures, explain the thinking behind every brushstroke, show their own mistakes, and keep your supply list short and honest. Pair that instruction with thirty minutes of daily practice — washes, mixes, small studies — and cotton paper that does not fight you.
Six months from now, you will look at a painting you made and feel the specific quiet pride of a skill earned the hard way: one wash at a time. (And if you catch the handmade bug more broadly, pottery at home scratches a similar itch with gloriously muddy hands.)