






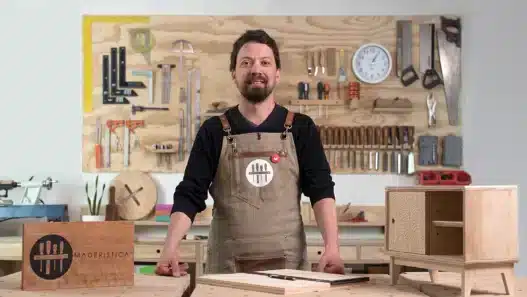
There is a specific kind of pride that comes from setting a coffee cup down on a table you built yourself. Nobody else in the world owns that exact table. It wobbles slightly — your first one probably will — but it’s yours, and it will outlast most of the flat-pack furniture in your house.
Furniture making looks intimidating from the outside. The workshops look serious, the tools look expensive, and the vocabulary (mortise, tenon, dado) sounds like a foreign language. But the fundamentals are learnable at home, and online courses have made it possible to go from “I’ve never used a saw” to building real, usable furniture without apprenticing in someone’s garage. Here’s how to start.
What furniture making actually involves
Building furniture is three skills braided together:
- Design: sketching what you want, working out dimensions, and thinking about how the piece will be used. A bookshelf that can’t hold books is sculpture, not furniture.
- Joinery: the methods that hold wood together — screws, dowels, pocket holes for beginners; mortise-and-tenon and dovetails as you advance. Joinery is the heart of the craft.
- Finishing: sanding, staining or oiling, and protecting the surface. This is what separates “homemade” from “handmade” in people’s eyes.
Most beginner courses teach all three through a single project — often something like a small wardrobe, a side table, or a shelving unit. You learn the skills because the project demands them, which is far more motivating than practicing joints on scrap wood for a month.
Wood: the material that makes or breaks your project
Beginners often grab whatever lumber is cheapest, then wonder why their project warped or split. A quick primer:
- Pine is cheap, soft, and forgiving — perfect for first projects. It dents easily, so save it for pieces that won’t take abuse.
- Poplar is the unsung hero for beginners: inexpensive, stable, takes paint beautifully.
- Oak is harder and more durable but less forgiving of mistakes. A good second-wood once your joints are reliable.
- Plywood is genuinely useful for carcasses and shelves — don’t let purists shame you. Good-quality birch plywood makes excellent furniture.
Buy your lumber from a real lumberyard rather than the big-box store when you can. The wood is straighter, the staff know what they’re talking about, and it’s often cheaper.
Tools: start smaller than you think
You do not need a workshop full of machinery to build furniture. A realistic beginner kit:
- Measuring and marking: tape measure, combination square, carpenter’s pencil
- Cutting: a jigsaw and a circular saw with a guide (or a handsaw if you’re going old-school)
- Shaping: a router or trimmer, sandpaper in several grits, a sanding block
- Assembly: clamps (you will never have enough clamps), a drill/driver, a hammer
- Safety: glasses, ear protection, and a dust mask — non-negotiable
Notice what’s missing: a table saw, a planer, a jointer. Those are wonderful, but plenty of furniture gets built without them. Buy tools as projects demand them, not before. If you’re starting a hands-on skill later in life, this pay-as-you-go approach also keeps the whole thing affordable and low-pressure.
Safety isn’t optional
Woodworking tools can hurt you, and online courses sometimes gloss over this. A few rules that experienced makers actually follow:
- Always know where both hands are before a blade moves.
- Unplug tools when changing blades or bits. Every time.
- Wear the glasses. Sawdust in the eye ends more shop sessions than dull blades do.
- Never rush a cut. If you’re tired, stop. Most injuries happen in the last twenty minutes of a long session.
Choosing an online woodworking course
Look for courses that teach through complete builds rather than isolated techniques. The best beginner courses share a few traits:
- They start with a project you actually want in your home — motivation matters when sanding gets boring.
- They explain why each step happens, not just what to do. Understanding why a joint is strong lets you design your own pieces later.
- They show mistakes and fixes. An instructor who only shows perfect work is hiding the most useful part of learning.
- They cover finishing properly. A well-finished pine table looks better than a poorly finished oak one.
Video quality matters more here than in most crafts — you need to see exactly how the instructor holds the tool and where their hands are. Preview the lessons before buying.
Your first three projects, in order
Don’t build a dining table first. Work up to it:
- A simple shelf or rack. Straight cuts, basic joinery, immediate usefulness. Teaches measuring and assembly.
- A side table or stool. Introduces legs, aprons, and making something level and stable — harder than it sounds.
- A small cabinet or wardrobe with a door. Doors are the boss level of beginner furniture: they have to fit, swing, and stay square.
Each project reuses the skills of the last one and adds a layer. By the third, you’ll be designing small modifications on your own — which is the moment you stop following courses and start being a woodworker.
Mistakes every beginner makes
- Measuring once. The saying exists for a reason. Measure twice, cut once, and still keep a little extra length on critical pieces.
- Skipping sanding steps. Jumping from 80-grit to 220-grit leaves scratches. Work through the grits; finishing rewards patience.
- Over-tightening clamps. This squeezes out all the glue and weakens the joint. Snug is enough.
- Ignoring wood movement. Wood expands and contracts with humidity. Gluing a wide panel rigidly into a frame is how you get cracks six months later. Good courses teach you to allow for it.
Setting up a workspace in small spaces
Not everyone has a garage. A folding workbench on a balcony, a corner of a basement, or even a sturdy table with a protective top can work for small furniture projects. What matters more than square footage:
- Dust control: sanding creates fine dust that gets everywhere. Work near ventilation, wear your mask, and consider a simple box fan with a furnace filter taped to it — the classic budget air cleaner.
- Flat assembly surface: furniture comes out square only if it’s assembled on something flat. A sheet of plywood on sawhorses works.
- Storage for lumber: store boards flat and stickered (with spacers) so they don’t warp while waiting. Leaning boards against a wall invites curves.
- Noise awareness: power tools are loud. If you share walls, hand tools and sensible hours keep the peace — and hand-tool woodworking is a deeply satisfying skill in its own right.
Frequently asked questions
Can I learn woodworking without a workshop?
Yes, with caveats. A garage, a balcony, or even a well-ventilated corner works for small projects. You’ll need space to clamp and somewhere to store lumber. Many beginners build their first pieces with hand tools specifically because they’re quieter and need less space.
How much does it cost to start?
A basic tool kit plus materials for a first project typically runs a few hundred dollars — less if you buy used tools, which is a great strategy for hand tools and clamps. The expensive part is the big machinery, which you don’t need yet.
How do I stay consistent with practice?
Woodworking projects take weeks, which makes it easy to stall halfway. Building a learning habit that sticks helps enormously here — even one focused hour on a Saturday morning keeps a project alive. Leave your tools set up if you can; setup friction kills more projects than lack of skill.
Start with the shelf. Finish the shelf. Then look around your home with new eyes — because once you’ve built one piece of furniture, every room starts looking like a list of projects.