





Your favorite photos are trapped on your phone. Thousands of them — the trip, the dog, your grandmother’s laugh — living as pixels you’ll scroll past twice a year. What if your best photo could become something you can actually touch? Something textured, handmade, and hanging on your wall?
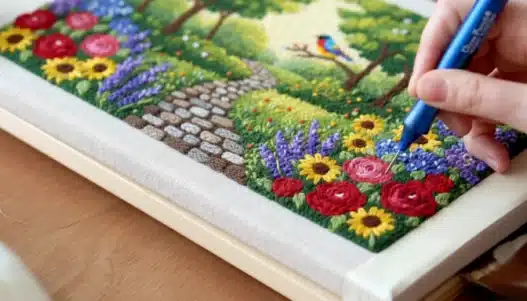
Welcome to photo embroidery: the art of translating photographs into thread. Using punch needle or traditional stitching, you can turn any image into a vibrant, tactile portrait. It’s deeply relaxing, genuinely impressive, and easier to start than you’d guess.
What “Painting with Thread” Actually Means
The technique has a few names — punch needle embroidery, thread painting, photo embroidery — but the idea is the same: instead of paint, your medium is yarn or thread, and instead of brushstrokes, you build the image loop by loop or stitch by stitch. The result has a physical texture no print can match. Light catches the loops differently from every angle; the piece feels alive.
Two main approaches:
- Punch needle. A special tool punches loops of yarn through fabric from the back, creating a plush, rug-like texture on the front. Fast, forgiving, and fantastic for bold, graphic translations of photos.
- Thread painting (needle painting). Traditional embroidery with long-and-short stitches that blend colors like paint. Slower, more detailed, capable of near-photographic results.
Beginners should start with punch needle — it’s faster to learn, mistakes are easy to fix (just pull the yarn out), and the chunky texture is very forgiving of simplified designs.
Choosing the Right Photo
Not every photo translates well to thread. The best candidates:
- Strong contrast. Clear light and dark areas. A backlit portrait or a bold landscape works; a hazy gray group shot doesn’t.
- Simple composition. One subject, uncluttered background. Thread can’t do fine detail easily, so busy photos become mud.
- Emotional weight. Pick a photo you love. You’ll spend hours with it — make sure it’s worth staring at.
- Good resolution. You’ll be zooming in to study color areas. A blurry photo gives you nothing to work from.
Portraits of people and pets are the classic choice — faces carry the emotion that makes thread art special.
Your Embroidery Basket: What You Need
- Punch needle tool — the adjustable kind lets you change loop height, which controls texture.
- Monk’s cloth or linen — the foundation fabric. It needs a loose enough weave for the needle to pass through.
- Yarn or embroidery floss — worsted-weight yarn for punch needle; floss for thread painting. Buy more colors than you think you need; blending is everything.
- An embroidery hoop or frame — keeps the fabric drum-tight, which is non-negotiable for even loops.
- Fabric marker or transfer method — to get your design onto the cloth.
Total startup cost is modest — well under what most craft hobbies demand. Check when free vs. paid learning is worth it before buying a course; for punch needle, free tutorials cover the basics well.
From Photo to Pattern: The Translation
This is the real skill — and the real fun. You’re not copying the photo; you’re translating it into a simpler visual language:
- Simplify into shapes. Look at your photo and identify 5–8 major color areas: sky, skin shadow, skin light, hair dark, hair light, shirt, background. Thread art lives or dies on bold simplification.
- Posterize it. Use a free photo editor to reduce the image to 6–8 flat colors (most editors call this “posterize”). This becomes your stitching map.
- Transfer the outlines. Trace the major shapes onto your fabric with a marker. Don’t trace details — just the boundaries between color areas.
- Plan your palette. Lay out your yarns next to the posterized image. Match each flat area to a yarn, choosing slightly varied tones for areas you’ll blend.
The Stitching: Techniques That Matter
- Fill shapes completely. Punch loops close together with no fabric showing through. Gaps are the beginner giveaway.
- Work background to foreground. Stitch the background first, then layer the subject over it. Same logic as painting.
- Blend with lines. Where two colors meet — a cheek turning into shadow — alternate loops of both colors along the boundary. This creates the gradient effect that makes thread look like paint.
- Vary loop height for texture. Taller loops in the foreground, shorter in the background. Texture becomes depth.
- Details last. Eyes, small features, outlines — do these at the very end with the finest tool you have.
Finishing Like a Pro
A finished piece needs proper backing: trim the excess fabric, glue or stitch a felt backing, and frame it in a hoop or shadow box. Presentation is half the perceived value — a well-finished piece looks like art; an unfinished one looks like a craft project. If you’re thinking of selling, this step is what justifies the price.
Photograph your work in natural daylight, slightly angled to show texture. Flat scans kill thread art; raking light across the loops shows what makes it special. Good photos of your work matter enormously if you ever want to share or sell — and basic photography skills transfer directly.
Beyond the Hobby: Gifts, Decor, Income
Thread portraits make extraordinary gifts — a pet portrait in yarn hits differently than a framed print. As home decor, they’re unique almost by definition. And yes, there’s a market: personalized textile art sells well on marketplaces like Etsy, where “handmade from your photo” is a proven product category. If that path interests you, this guide to turning a craft into a brand covers the business side that applies to any handmade product.
Frequently Asked Questions
How long does one portrait take?
A small punch needle portrait (8×10 inches) takes a focused beginner roughly 6–10 hours spread over a week. Thread painting takes two to three times longer. It’s meditative, not fast — that’s the point.
I can’t draw. Can I still do this?
Absolutely — you’re tracing and filling, not freehand drawing. The posterize-and-transfer method does the “drawing” for you. Many thread artists can’t sketch at all.
What if I mess up?
Pull the yarn out and redo it. Punch needle is the most forgiving textile art in existence — mistakes literally unravel. This is why it’s the perfect beginner medium.
Designing for Gifts: The Personal Touch
A thread portrait of someone’s pet, child, or wedding day isn’t just decor — it’s one of the most emotionally potent gifts you can make. Handmade beats bought, and personalized handmade beats everything. A few tips for gift pieces:
- Start early. Gift deadlines are real and thread art is slow. Begin at least a month before you need it — rushing shows in the stitching.
- Choose the photo together (sort of). If it’s a surprise, recruit someone close to the recipient to help pick the photo. The right image matters more than your technique.
- Keep a consistent style. If you make pieces for several people, a recognizable style turns individual gifts into a “collection” — and eventually into a product line, if you want one.
- Present it properly. A hoop finished with a felt backing and a small handwritten card explaining the piece (“42 hours, 8 colors, one very good dog”) transforms craft into heirloom.
Fair warning: the first gift portrait you give away will generate requests. “Could you make one of my dog?” Decide in advance whether you’re open to commissions — because saying yes casually to five people is how hobbies become stressful second jobs. If you want the commissions, price them properly from the start: materials plus an hourly rate you’d actually accept. Underpricing handmade work is the classic beginner mistake.
Can I really sell these, or is the market saturated?
Personalized textile art holds up well because every piece is unique by definition — you can’t mass-produce “my grandmother’s portrait in thread.” The market rewards distinct style and good photography of the work. Start with gifts, let word of mouth build, and add a simple commission page only when demand appears on its own.
Free the Photos
Pick one photo tonight — the one that makes you smile every time. Posterize it, trace it, and punch your first loop this weekend. In a week, that trapped pixel-memory will be texture you can touch. Your walls are waiting.