









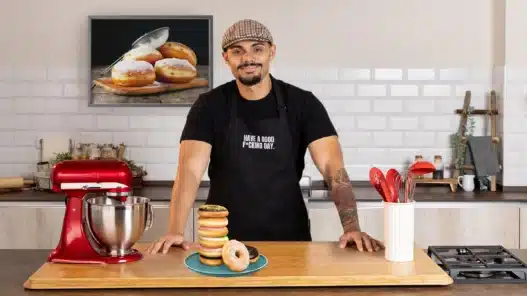

The first time I bit into a truly great doughnut — still faintly warm, the glaze crackling, the inside impossibly fluffy — I assumed it required industrial equipment and professional training. It doesn’t. Some of the best doughnuts I’ve ever had came from a home kitchen, made by someone who’d simply learned the handful of techniques that separate bakery-quality from sad and greasy.
This guide covers everything you need to bake exceptional doughnuts at home: the science, the equipment, a foolproof weekend project, and the troubleshooting knowledge that turns failures into learning.
What Makes a Great Doughnut
A great doughnut is a study in contrasts: a delicately crisp exterior giving way to a soft, airy interior that’s rich but not heavy. Achieving that comes down to three things:
- Proper fermentation: time develops flavor and texture that rushing can’t fake
- Correct frying temperature: the difference between golden and greasy is about 10 degrees
- Freshness: doughnuts are at their peak within hours of frying — which is exactly why homemade beats store-bought
There are two main families: yeast-raised doughnuts (light, airy, chewy — the classic ring) and cake doughnuts (denser, tender, like a fried muffin). This guide focuses on yeast-raised, the bakery standard, with notes on cake versions.
Equipment: Less Than You’d Think
- A heavy pot or Dutch oven: for frying. Heavy means stable temperature, which is everything.
- A thermometer: non-negotiable. Guessing oil temperature is how you get greasy doughnuts. A $15 probe thermometer is fine.
- A stand mixer or strong arms: enriched dough needs thorough kneading. A mixer helps; hand-kneading builds character (and forearms).
- A round cutter set: a large biscuit cutter and a small one for the hole. In a pinch, a glass and a bottle cap work.
- A slotted spoon or spider strainer: for lifting doughnuts from oil safely.
- Cooling rack over a sheet pan: for draining and glazing.
No doughnut-specific gadgets required. The thermometer is the only true essential — everything else has a workaround.
The Science You Actually Need
You don’t need a food science degree, but understanding three things will improve every batch:
Gluten development
Kneading builds the gluten network that traps gas and gives doughnuts their chew. Under-kneaded dough makes dense doughnuts; the windowpane test (stretching a piece thin enough to see light through) tells you when you’re done.
Fermentation
Yeast needs time. A slow, cool rise develops complex flavor; rushing with extra yeast or heat gives you bland, yeasty doughnuts. Patience is an ingredient.
Frying temperature
The sweet spot is 350–365°F (175–185°C). Too cool and the dough absorbs oil before the crust sets — greasy. Too hot and the outside burns before the inside cooks — raw centers. Temperature drops when you add doughnuts, so fry in small batches and let the oil recover between them.
Your Weekend Project: Classic Glazed Doughnuts
This is the project that teaches you everything. Plan for a relaxed Saturday morning — most of the time is waiting, not working.
Morning: Mix and knead (30 minutes active)
Combine flour, sugar, salt, yeast, warm milk, eggs, and softened butter. Knead until smooth and elastic — about 10 minutes by mixer, 15 by hand. The dough should be soft and slightly tacky, not stiff.
Late morning: First rise (1–2 hours)
Let the dough rise in a warm spot until doubled. Don’t watch the clock; watch the dough. Under-risen dough makes dense doughnuts.
Midday: Shape (20 minutes)
Roll to about half-inch thickness, cut rings, and place on floured parchment. Let them proof again until puffy — 30–45 minutes. This second rise is what creates the airy interior.
Afternoon: Fry (30 minutes)
Heat oil to 360°F. Fry 2–3 doughnuts at a time, about a minute per side, until deep golden. Drain on the rack for a minute, then glaze while warm — the glaze sets into a crackly shell as they cool.
That first bite of a doughnut you made from scratch, still warm, is a genuine life highlight. You’ll understand why people get obsessed.
Glazes, Fillings, and Toppings
Once the base technique is solid, this is where creativity explodes:
- Classic glaze: powdered sugar, milk, vanilla. Simple, perfect.
- Chocolate glaze: ganache-like, sets with a snap.
- Custard and jam fillings: pipe into round doughnuts (no hole) after frying.
- Toppings: crushed nuts, sprinkles, toasted coconut, bacon (trust the process), matcha powder, brown butter glaze.
Filled doughnuts deserve a note: fry them as solid rounds, then fill with a piping bag once cool enough to handle. Custard fillings need to be fully cooked and cooled — food safety matters as much as flavor.
Troubleshooting: What Went Wrong?
Greasy doughnuts: oil too cool, or overcrowded the pot. Thermometer. Small batches. Non-negotiable.
Dense, heavy texture: under-proofed. Let the shaped doughnuts rise until visibly puffy and they spring back slowly when poked.
Raw centers: oil too hot, or doughnuts too thick. Lower the heat slightly and roll thinner.
Misshapen or deflated: handled roughly after proofing. Move shaped doughnuts gently — they’re full of air you want to keep.
Glaze too thin or too thick: adjust with tiny amounts of liquid or sugar. Glaze consistency is finicky; make it fresh each batch.
Cake Doughnuts: The Quicker Cousin
No yeast, no rising — just mix, pipe or scoop, and fry. The texture is denser and more crumbly, closer to an old-fashioned cake. They’re faster (under an hour start to finish) and more forgiving, making them a great weeknight project. Many bakers prefer them; it’s a texture preference, not a quality hierarchy.
Learning More: Courses Worth Taking
Home baking has a wonderful online learning community. Structured baking courses on course marketplaces can accelerate you past the trial-and-error phase — particularly for laminated doughs, advanced decorating, or scaling up. Look for instructors who are working bakers, not just content creators, and courses with detailed troubleshooting sections.
Baking also fits beautifully into a busy life — it’s the kind of hands-on learning that works well in evenings and weekends. Our guide to building a realistic learning routine after work was practically written for hobby bakers. And if your doughnuts get good enough that friends start offering money, turning learning into income covers the path from hobby to side business.
Frequently Asked Questions
Can I bake doughnuts instead of frying?
You can, but they won’t taste like doughnuts — they’ll taste like sweet bread in a ring shape. The frying is what creates the texture. If you want baked, embrace cake doughnuts baked in a doughnut pan; they’re delicious on their own terms.
What oil is best for frying doughnuts?
Neutral oil with a high smoke point: vegetable, canola, or peanut. Avoid olive oil (wrong flavor, low smoke point). Strain and reuse frying oil a few times — it gets better the second use.
How do I store homemade doughnuts?
Honestly? Eat them within 6–8 hours. Doughnuts stale fast — it’s the nature of fried dough. If you must store them, an airtight container at room temperature for one day max. Never refrigerate; it accelerates staling.
Why did my doughnuts absorb so much oil?
Almost always temperature: oil below 350°F. Also check that you didn’t overcrowd the pot, which crashes the temperature. A thermometer eliminates the guesswork.
Can I make the dough ahead of time?
Yes — a cold overnight ferment in the fridge actually improves flavor. Shape cold dough straight from the fridge, then proof at room temperature. It’s also the secret to fresh morning doughnuts without a 5am start. For staying consistent with any long learning project, our tips on staying motivated while learning alone apply as much to baking as to anything else.