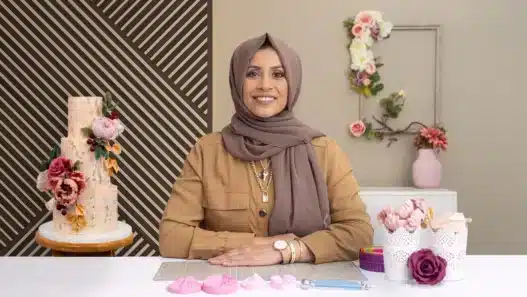









Everyone has had the moment: walking past a bakery window, stopping, and thinking how is that even cake? Modern cake design — sharp edges, marbled fondant, textured buttercream that looks like stone or watercolor — can seem like sorcery. It’s not. It’s a sequence of learnable techniques, each building on the last, and beginners are often shocked at how quickly their cakes start looking professional.
Cake decorating is also unusually practical as a skill: unlike most crafts, your practice pieces get eaten. This guide breaks down what modern cake design actually involves, the order to learn it in, and how to choose an online course that takes you from lopsided home bakes to cakes people photograph before cutting.
What “cake design” means today
Forget the piped roses of the 1980s (charming, but dated). Modern cake decorating trends include:
- Textured buttercream — spatula strokes, palette-knife painting, and rustic finishes that look effortless and hide imperfections beautifully.
- Sharp-edged fondant — those impossibly crisp, architectural cakes. Harder than it looks; very teachable.
- Color work — marbling, watercolor effects, bold color-blocking, metallic accents.
- Modern piping — updated techniques with Russian tips, basket weaves, and sculptural borders.
- Structural design — multi-tier cakes, gravity-defying elements, and internal supports that keep tall cakes standing.
Notice what all of these share: they’re finishing skills. The cake underneath still has to taste good — design without flavor is a beautiful disappointment.
The skill ladder: learn in this order
Beginners who jump straight to fondant sculptures struggle because they skipped foundations. Here’s the sequence that actually works:
- Bake reliably. Level layers, moist crumb, consistent results. If your cakes dome, sink, or dry out, decorating is premature. Nail two or three core recipes first.
- Fill and stack. Torting layers evenly, applying fillings without bulges, and stacking straight. A crooked stack can’t be saved by pretty frosting.
- Crumb coat and smooth coat. The thin “dirty ice” layer that traps crumbs, then the smooth final coat. This is where spatula technique begins — and where most beginners need the most practice.
- Basic piping. Borders, dots, shells, rosettes. Repetitive practice builds the muscle memory; there’s no shortcut.
- Color and texture. Marbling, palette-knife work, textured finishes. This is where personal style emerges.
- Fondant covering. Rolling, draping, smoothing without tears or elephant skin. Genuinely tricky the first five times, then suddenly fine.
- Advanced design. Multi-tier structure, sculptural elements, hand-painting. The fun stuff, earned.
Each level makes the next one possible. A good course follows this progression rather than throwing you at fondant on day one.
Essential tools (and what you can skip)
Cake decorating has a gadget problem — entire aisles of single-use tools. The honest starter kit:
- Turntable — the single most transformative tool. Smoothing and piping without one is fighting with one hand tied.
- Offset spatulas (small and large) — for spreading and smoothing.
- Bench scraper — for those sharp, smooth sides.
- Piping bags and a basic tip set — round, star, petal, and leaf tips cover most beginner work.
- Kitchen scale — baking by weight is more consistent, and consistency is everything.
- Cake boards and a level — unglamorous, essential.
Skip for now: airbrush kits, specialty molds, and anything marketed as a “must-have” in a sponsored video. Buy tools when a technique demands them.
Practicing without going broke (or gaining 20 pounds)
The practice problem is real: you can’t decorate ten cakes a week and eat them all. Solutions working decorators actually use:
- Practice on dummies. Styrofoam cake dummies let you practice covering, smoothing, and piping endlessly. Decorate, scrape off, repeat.
- Bake small. Six-inch cakes use a fraction of the ingredients and give you the same technique reps.
- Give it away. Friends, neighbors, coworkers — free cake makes you popular and gives you real deadlines, which improve your work.
- Photograph everything. Photos reveal flaws your eyes miss in person, and they become your portfolio.
Choosing an online cake design course
Cake courses vary wildly in quality. The good ones:
- Teach the full ladder — baking foundations through advanced decorating — or are honest about which rung they cover.
- Show real-time technique, not just finished reveals. You need to see the spatula angle, the pressure, the pace.
- Include recipes that actually work, with weights not just volumes.
- Cover the business side if that’s your goal: pricing (charge for your hours, not just ingredients), food safety basics, and working with clients.
- Have an instructor whose style you want to learn — modern minimalist, classic elegant, whimsical. Taste matters here.
If you’re thinking about selling cakes eventually, start learning the business math early. Event planning courses are a surprisingly relevant complement — weddings and parties are where custom cake orders come from, and understanding that world helps you position your work.
From hobby to side income: the honest version
Custom cakes can absolutely become income — but go in with open eyes:
- Price properly from day one. Ingredients + your hours + overhead + profit. Underpricing is the number one killer of cake businesses, and it’s almost always driven by guilt rather than math.
- Start with people you know. Birthday cakes for friends build your portfolio and your confidence before strangers trust you with wedding cakes.
- Learn food safety rules for your area. Cottage food laws vary enormously — what’s legal in one place is illegal next door.
- Photograph in good light. Your Instagram is your storefront. A decent photo of a good cake outsells a bad photo of a great cake.
Content creation skills help enormously here — courses for aspiring creators teach the filming and posting habits that turn cake photos into cake orders.
Finding your decorating style
Early on, copy widely — recreate cakes you admire to learn their techniques. But pay attention to which styles excite you: the clean architectural look, the painterly textured style, the whimsical colorful approach. Your style emerges from the intersection of what you’re good at and what you love making.
Once you notice a preference, lean into it deliberately. Take on projects in that style, study the decorators who define it, and develop signature touches — a particular way with color, a texture you do better than anyone. In a crowded field, a recognizable style is worth more than technical range. Clients don’t hire “someone who can do everything”; they hire the person whose cakes look like that.
Beginner mistakes to skip
- Decorating a warm cake. Frosting melts, slides, and absorbs. Cool completely — chill, even. Patience is an ingredient.
- Skipping the crumb coat. Those little cake crumbs in your final frosting layer? Preventable in ten minutes.
- Overworking buttercream. Too much mixing incorporates air; too warm a kitchen melts it. Learn what your frosting should feel like.
- Unlevel layers. Level with a serrated knife or wire leveler. “Rustic” is a style choice, not an excuse.
- Comparing to professionals’ highlight reels. That flawless cake took someone hours and probably three attempts. Your week-three cake is supposed to look like a week-three cake.
Frequently asked questions
Do I need to be a good baker to learn cake design?
You need reliable baking — consistent, level, tasty layers — more than fancy baking. Two or three solid recipes are enough foundation to start decorating seriously.
Buttercream or fondant — which should I learn first?
Buttercream. It’s more forgiving, tastes better to most people, and teaches the smoothing and piping fundamentals that transfer to everything else. Add fondant once your buttercream work is solid.
How long until my cakes look professional?
Most dedicated beginners see a dramatic jump within 2–3 months of regular practice. The first cake that makes someone say “wait, YOU made that?” usually arrives sooner than you’d expect — often around cake number eight or ten.
Bake the layers this weekend. Crumb-coat them. Take the photo. Then do it again next weekend — because the tenth cake is where the magic starts, and the only way to get there is through cakes one through nine.