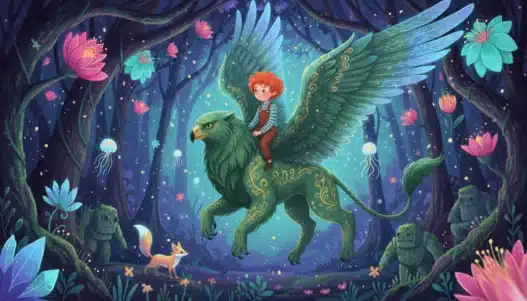







You have magical worlds in your head. Floating islands. Glowing forests. Tiny houses with impossible architecture. They’re vivid when you close your eyes — and completely stuck there, because “3D modeling” sounds like something that requires a supercomputer and an engineering degree.
It doesn’t. The most popular 3D software on earth is free, your current computer can probably run it, and the learning curve — while real — is mostly a matter of surviving the first two weeks. Let’s build your first world.
The Software Question (Solved in One Paragraph)
Use Blender. It’s free, open-source, and does modeling, sculpting, texturing, animation, and rendering in one program. Studios use it, indie game developers use it, Hollywood uses it for previz. The paid alternatives (Maya, 3ds Max, Cinema 4D) cost thousands per year and offer a beginner nothing Blender doesn’t. Download Blender, and the software question is over forever.
Your Computer Is Probably Fine
The myth: you need a monster PC. The reality: Blender runs on modest hardware. You’ll render slower than someone with a fancy GPU, but you’ll learn at exactly the same speed. Start with what you have. Upgrade when your skills — not your anxiety — demand it. The one thing that genuinely helps early on is a three-button mouse (the middle button is heavily used), which costs almost nothing.
The Concepts, in Plain English
3D modeling has a small set of core ideas. Learn these and the tutorials stop sounding like a foreign language:
- Mesh: your model, made of vertices (points), edges (lines), and faces (surfaces). Everything in 3D is a mesh.
- Modifiers: non-destructive effects stacked on a mesh — smooth it, mirror it, subdivide it. Learn the Subdivision Surface and Mirror modifiers first; they do half the work in every beginner project.
- Materials and shaders: what surfaces are made of — how they reflect light, how rough or shiny they are. A gray cube becomes gold, glass, or jelly here.
- Lighting: the difference between amateur and professional renders. Three-point lighting (key, fill, rim) is a century-old film technique that works perfectly in 3D.
- Rendering: the final calculation that turns your scene into an image. Slow, but it’s when the magic happens.
Your Learning Path: The First Month
Don’t try to learn everything. Follow this order:
- Week 1: Navigation and basic modeling. Learn to move around the viewport without crying. Model simple objects: a mug, a table, a sword. Follow one beginner tutorial series start to finish — the famous donut tutorial exists for a reason (it covers modeling, materials, lighting, and rendering in one project).
- Week 2: Modifiers and materials. Rebuild your week-1 objects using modifiers. Learn the shader editor basics: Principled BSDF is your best friend.
- Week 3: Lighting and composition. Take a simple scene and light it five different ways: noon, sunset, night, horror, dreamy. Same models, completely different worlds. This week teaches you that lighting is the art.
- Week 4: Your first original scene. No tutorial. A small magical world from your head — a floating island, a cozy room, a weird little planet. It’ll be rough. It’ll be yours.
Fifteen to thirty minutes a day beats a five-hour weekend binge. 3D is a motor skill as much as a mental one — your hands need the reps. The same habit principles in building a learning habit that sticks apply perfectly here.
Stylized Beats Realistic (For Beginners)
Here’s a strategic tip: aim for stylized worlds, not photorealism. Stylized 3D (think animated films, cozy games) is more forgiving, faster to learn, more distinctive in a portfolio — and honestly more magical. Photorealism is a technical arms race against render farms; stylized art is a style, and style is free. Your magical worlds want to be stylized anyway.
Where This Goes: Real Opportunities
3D skills pay. Indie games, product visualization, architectural rendering, motion graphics, 3D printing, virtual production — the market for 3D generalists keeps growing, and remote freelance work is normal in this field. The path from hobby to income is well-trodden: learn, build a portfolio while you learn, take small freelance jobs, grow. Plenty of working 3D artists started exactly where you are — see how learners turn course certificates into paychecks for the playbook.
If you’re picking this up as an adult career-changer or late-blooming creative, this field guide to starting a creative skill at 30, 40, or 50 is worth a read — 3D is one of the most age-agnostic creative fields there is.
Frequently Asked Questions
How long until I’m actually good?
You’ll make things you’re proud of within a month. You’ll make things that impress others within six months of consistent practice. Professional-level work takes one to two years — same as any serious craft.
Should I learn sculpting or hard-surface modeling first?
Hard-surface (modeling objects with clean geometry) first. It teaches the fundamentals — topology, modifiers, precision — that make sculpting easier later. Sculpting first tends to produce blobby frustration.
Is AI going to replace 3D artists?
AI generates assets; it doesn’t art-direct, compose scenes, or understand story. The artists who thrive will be the ones who use AI as a tool inside a real 3D workflow — which requires knowing the workflow. Learning 3D now is learning to direct the machines later.
Free Resources Worth Their Weight in Gold
One of Blender’s superpowers is its ecosystem — an absurd amount of professional-quality learning material costs nothing. The essentials:
- Blender’s own manual and tutorials. Start here for the fundamentals. Dry but authoritative — when a tutorial contradicts the manual, the manual is right.
- Blender Guru’s donut tutorial. The classic beginner series for a reason: it walks you through an entire project — modeling, materials, lighting, rendering, compositing — so you see how the pieces connect.
- Grant Abbitt and Blender Secrets. Grant’s beginner-friendly modeling exercises and the Blender Secrets channel’s sixty-second tips fill the gaps between big tutorials.
- Poly Haven. Free professional HDRIs, textures, and models with no catch. Good lighting HDRIs alone will make your early renders look twice as good.
- Blender Artists forums and the Blender subreddit. Post your work early and often. The community is famously welcoming to beginners, and specific questions get specific answers.
Avoid tutorial hell — the trap of watching fifty tutorials without finishing a project. The rule: for every hour of tutorial, spend two hours building something on your own. Tutorials teach techniques; only independent projects teach judgment.
Should I learn sculpting, animation, or something else after modeling?
Follow your projects, not a curriculum. Want characters? Learn sculpting next. Want short films? Animation and rigging. Want game assets? Retopology and UV unwrapping. The “correct” next step is whatever your current project demands — need-driven learning sticks, curriculum-driven learning fades.
Can I learn 3D on a laptop?
Yes. Most beginners learn on laptops — modeling and learning the interface need almost no power. Only heavy rendering benefits from a strong GPU, and by the time your projects demand that, you’ll know exactly what to upgrade. Don’t let hardware be the excuse that delays month one.
Build the World
That island in your head? It wants to exist. Download Blender tonight, model something ugly tomorrow, and keep going. Every 3D artist you admire was once exactly where you are — staring at a gray cube, wondering how it becomes a world. The answer is always the same: one modifier, one material, one render at a time.