






Let us clear something up first: you do not need to “be a designer” to make things that look designed. That gatekeeping belongs to a previous decade. These days, a freelancer with Canva and good taste produces client-ready work every single day, while trained designers quietly use Canva too for the fast stuff.
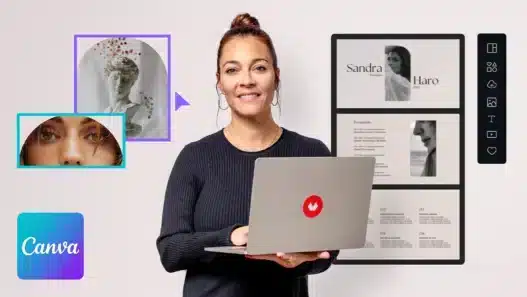
Canva is an all-in-one design platform that runs in your browser: presentations, social posts, posters, videos, documents, even simple websites, all from drag-and-drop templates and a genuinely capable editor. The free version is generous; the Pro version adds brand kits, background removal, and a bigger asset library. What it does not give you, on its own, is judgment: which fonts pair well, how to lay out a page so people actually read it, how to make a brand look consistent. That is what a good course is for.
This guide covers what Canva can really do, what a beginner course should teach you beyond button-clicking, and how to go from template-filler to someone who designs with intent.
The myth: “Canva is just templates”
Templates are Canva’s most visible feature and its most misunderstood one. Used badly, they produce the generic look everyone recognizes: same layouts, same fonts, same stock photos, the visual equivalent of a form letter. Used well, they are starting points, raw material to be customized until the template is unrecognizable.
The difference between those two outcomes is design literacy, and it is entirely learnable: a bit of typography, a bit of color theory, a bit of layout logic. None of it requires art school. A good Canva course teaches the tool and the taste, in that order of importance.
What Canva actually does (beyond what you have tried)
Most casual users touch 10 percent of the platform. The full picture includes:
- Brand Kits: save your colors, fonts, and logos so every design starts on-brand. This is the feature that separates hobby use from professional use.
- Docs, Presentations, and Websites: Canva now covers documents with real layout, slide decks with presenter tools, and one-page websites you can publish. One subscription can replace three other tools.
- Video and animation: simple video editing, animated social posts, and presentation transitions. Not a replacement for a real video editor, but plenty for content creation.
- Background remover and Magic tools: one-click background removal, image expansion, and AI-assisted editing that used to require Photoshop skills.
- Collaboration: real-time co-editing, comments, and brand approvals. This is why teams and clients love it: no software to install, no files to email.
What a good course should teach you
Button tutorials are free everywhere. A course worth your time teaches design thinking inside Canva:
- Typography that works. How to pair fonts (one display, one body, done), sizing hierarchies, spacing, and the alignment habits that instantly make designs look professional. Bad typography is the fastest way to spot an amateur; good typography is the fastest way to look like a pro.
- Color with intent. Building palettes from brand colors or from images, understanding contrast for readability, and when to break the palette on purpose.
- Layout and composition. Grids, white space, visual hierarchy: where the eye goes first, second, third. This is the invisible skill behind every design that “just looks right.”
- Brand consistency systems. Setting up a brand kit, creating reusable templates for a business, and building a small library of on-brand graphics so content production becomes fast instead of a daily reinvention.
- Story-driven design. Designing for an audience and a goal, not for decoration: a social post that gets saves, a presentation that keeps attention, a one-pager that gets read. The best courses tie every technique to a real outcome.
- A portfolio project. A complete style guide plus a set of branded materials, or a designed web page, something that proves you can deliver a cohesive package, not just single graphics.
How to choose the right course
- Look for design principles, not just features. If the syllabus is “Lesson 1: the toolbar, Lesson 2: uploading images…” you are buying a manual. If it is “Lesson 1: why this poster works and this one does not,” you are buying judgment.
- Check the instructor’s own work. A Canva instructor’s portfolio should demonstrate taste. If their course thumbnails look generic, their teaching will produce generic.
- Match it to your goal. Social media content, client design work, presentations, and brand building are different applications. A course aimed at freelancers differs from one aimed at teachers or small business owners. Pick the one aimed at you.
- Free vs. Pro clarity. The instructor should be clear about which features need Pro and offer free workarounds where they exist. Courses that silently assume Pro throughout are not beginner-friendly.
Practical tips that speed everything up
- Build your brand kit on day one. Even a personal one: three colors, two fonts. Every future design gets faster and more consistent.
- Learn the keyboard shortcuts. Duplicating, aligning, grouping, locking: the ten minutes you spend learning shortcuts pays back every single day.
- Steal structure, not style. When you see a design you like, analyze its layout: where is the headline, how much white space, what is the hierarchy? Recreate the structure with your own content and branding.
- Design at the right size. Instagram post, story, A4 flyer: start from the correct dimensions instead of resizing later. Canva’s preset sizes exist for exactly this reason.
- Export correctly. PNG for web graphics, PDF for print, MP4 for video. Wrong export settings are the most common reason good designs look bad in the wild.
- Keep a swipe file. Save designs you admire in a folder. When you are stuck, browse it. Professionals do this constantly; it is research, not cheating.
If content creation is your goal, pair Canva skills with strategy: this guide to content creation for aspiring creators covers the planning side that makes designs perform.
Mistakes that mark you as a beginner
- Too many fonts. Two fonts is a system. Four fonts is a ransom note. This one rule fixes half of all amateur designs.
- Text over busy backgrounds. If people cannot read it, it does not matter how pretty it is. Darken the image, add a scrim, move the text. Readability always wins.
- Ignoring alignment. Elements placed “by feel” look messy. Align to edges, center deliberately, distribute evenly. Canva’s guides and grids do the math for you.
- Default template, zero changes. Swapping the photo in a template and calling it done is the fastest route to looking like everyone else. Change the fonts, the colors, the layout. Make it yours.
- Designing for yourself instead of the audience. You are not the target. A design that you love but your audience scrolls past is a failed design. Every choice should serve the viewer and the goal.
Frequently asked questions
Is the free version of Canva enough?
For learning and for most personal projects, yes. The free version includes the editor, thousands of templates, and ample assets. Pro becomes worth it when you need brand kits, background removal, or premium stock regularly, typically once you are doing client or business work.
Can I get design clients with only Canva skills?
Yes, in the right niches: social media design, presentations, simple brand packages for small businesses, and templated content systems. Many freelancers build solid incomes here. Be honest about the tool’s limits (no complex print work, no true vector logos for large-scale use) and you will do fine. For the business side, read turning learning into income.
Will learning Canva help me learn “real” design software later?
Absolutely. The design principles transfer completely: typography, color, layout, hierarchy. If you later move to professional tools, you will be learning software, not design, which is the much shorter journey. Plenty of designers started exactly this way, as this self-taught designer story shows.
How do I avoid the “made in Canva” look?
Customize aggressively: change fonts and colors from the template defaults, adjust layouts, use your own photos, and develop a consistent personal style. The “Canva look” is really just the “unchanged template look,” and it disappears the moment you design with intent.
Canva rewards the beginner’s greatest asset: willingness to experiment. Learn the principles, build your brand kit, customize everything, and export something every week. In a few months, people will be asking who your designer is.