








You know the feeling: you open Blender, stare at the gray cube, click something, and suddenly you are looking at a wireframe nightmare with 47 panels and no idea how to get back. Everyone who learns 3D goes through this. It is practically a rite of passage.
But here is the thing: you do not have to learn all of Blender. If your goal is to create kawaii characters, those round, soft, impossibly cute 3D figures, you need maybe 10 percent of what the software can do. A focused course strips away the 90 percent you do not need and walks you through the rest in order. This guide shows you exactly what that path looks like.
First: what “kawaii 3D” actually is
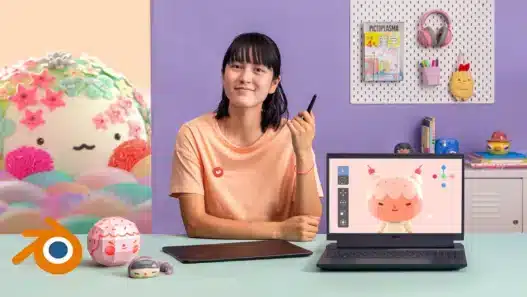
Kawaii is the Japanese aesthetic of cuteness: big eyes, small bodies, soft rounded forms, pastel or saturated cheerful colors. In 3D, it translates beautifully, because the style is fundamentally about simple, clean geometry. A kawaii character is often a sphere-ish head, a blob body, stubby limbs, and a face that is two eyes and a mouth. That simplicity is your friend. The modeling techniques are genuinely beginner-accessible in a way that realistic human modeling is not.
And the demand is real. Kawaii-style 3D characters show up in mobile games, VTuber avatars, stickers, toys, animations, and social media content. It is one of the most commercially friendly 3D styles a beginner can learn, and one of the fastest routes to a portfolio piece you are excited to share.
Blender: why it is the right tool
Blender is free, open-source, and absurdly powerful: modeling, sculpting, texturing, rigging, animation, and rendering all in one program. Ten years ago you would have needed thousands of dollars of software to do what Blender does for nothing. That matters for beginners because the only cost of trying is your time.
The tradeoff is the interface. Blender was designed by brilliant people who assumed you would read the manual. A good course is essentially a guided tour that keeps you out of the swamps: you learn the viewport navigation, the few modeling tools you need, and the render settings that matter, and you ignore everything else until you are ready.
The learning path, step by step
Here is the order a well-designed kawaii character course should follow. If you are evaluating courses, check the syllabus against this list:
Step 1: Concept and reference (before touching 3D)
Every character starts as drawings: front and side views of your character, even rough ones. You will model directly from these, so this step saves hours of guesswork later. Courses that skip it produce students who “wing it” in 3D and end up with lopsided characters.
Step 2: Blender survival basics
Viewport navigation (orbit, pan, zoom), object versus edit mode, and the sacred trio: move, rotate, scale. Plus saving, because Blender’s default save behavior has ended more beginner sessions than any bug. This unit should take hours, not weeks.
Step 3: Blocking out the character
Building the character from primitive shapes: spheres for the head, capsules for limbs, scaled and positioned to match your concept art. This is the most satisfying phase because a recognizable character appears fast. You will learn modifiers here too, especially Mirror (model half, get the other half free) and Subdivision Surface (the magic that turns blocky shapes smooth).
Step 4: Refining the forms
Pushing and pulling the blocked shapes into final forms: shaping the face, defining the body, adding ears, hair, or accessories. Kawaii style is forgiving here because everything trends toward round and soft, but proportions still matter: head size relative to body is what sells the cuteness.
Step 5: Materials and color
Assigning colors and simple materials: skin tones, the glossy kawaii eye material, fabric colors. Blender’s material system can go very deep; a beginner course should keep it to the essentials and get you to a good-looking result fast.
Step 6: Lighting and rendering
Three-point lighting simplified, a nice background, and render settings that do not take all night. This is where your character goes from “gray model” to “finished artwork.” Expect to learn the difference between the two render engines at a practical level: which one to use when.
Step 7: A finished, shareable character
The course should end with a complete character, posed and rendered, that you can post. This is non-negotiable. Half-finished gray models do not motivate anyone; a finished cute character you made does.
What you need (it is less than you think)
- A computer that runs Blender. Check the requirements, but most machines from the last several years manage fine for kawaii-style work, which is light compared to realistic 3D.
- A three-button mouse. Blender’s navigation assumes one. Trackpads are technically possible and practically miserable.
- A graphics tablet (recommended, not required). Helpful for sculpting touches and concept sketching, but you can model an entire kawaii character with just a mouse.
- Sketching supplies. Pencil and paper, or whatever you like to draw with, for the concept phase.
That is the whole list. The software is free, the hardware is whatever you already own plus a mouse. Few creative skills have a lower barrier to entry.
Choosing the right course
- Pick kawaii-specific, not Blender-general. A 40-hour “complete Blender” course will teach you architecture visualization and fluid simulation you will never use. A focused character course gets you to a finished character in a fraction of the time.
- Check the instructor’s characters. Do you like their style? You will be absorbing their taste along with their technique. Kawaii has substyles, from chibi to soft-plush; pick one that matches what you want to make.
- Watch for the “no experience required” claim, then verify it. Preview the early lessons. If lesson one assumes you know what a modifier is, the course is not really for beginners.
- Look for troubleshooting. Common beginner disasters: normals flipped inside out, subdivision creating weird pinches, mirror modifier chaos. Courses that address these explicitly save you hours of forum-searching.
Blender also has an enormous free tutorial ecosystem on video platforms, which is great for supplementing but chaotic for learning in order. This guide to learning from YouTube without getting distracted is worth reading if you plan to mix free and paid resources.
Practice habits for 3D beginners
- Model every day, even for 20 minutes. 3D navigation is a motor skill. Daily short sessions build the muscle memory that makes the interface disappear; weekly marathons just re-teach you the controls each time.
- Finish small characters before starting big ones. A simple blob character, completed and rendered, teaches the full pipeline. An ambitious character abandoned at 60 percent teaches frustration.
- Save versions obsessively. Save incremental versions (character_v01, v02…) before any risky operation. Blender’s undo is good; versioned saves are better. Future you will be grateful.
- Steal like a student. Recreate characters you admire as studies. This is how every 3D artist learned; your original work comes later, built on the technique the studies gave you.
- Render and share early. A rough render posted online gets you feedback and momentum. Waiting until something is “good enough” usually means waiting forever.
Mistakes to skip
- Trying to learn all of Blender. You need modeling, basic materials, lighting, and rendering. You do not need compositing nodes, Python scripting, or fluid sims. Not yet. Maybe never.
- Skipping the concept art. Modeling without reference views is like building furniture without measurements. The drawing does not need to be good; it needs to exist.
- Too much geometry too soon. Beginners subdivide everything into millions of polygons and then wonder why the software crawls and the forms look lumpy. Kawaii characters want low poly counts with smooth shading. Simple is correct.
- Ignoring lighting. A mediocre model with great lighting looks better than a great model with bad lighting. Lighting is half the final image and beginners spend a tenth of their time on it. Flip that ratio.
- Course-hopping. Blender has infinite tutorials. Pick one course, finish it, make the character. The second course will make sense in a way it never could before the first.
Frequently asked questions
Is Blender really free? What is the catch?
Really free, no catch: open-source, full-featured, used by professionals and studios. It is funded by donations and corporate sponsors, not by upselling you.
Do I need to know how to draw?
Basic sketching helps for the concept phase, but kawaii character design is about simple shapes and appealing proportions, not draftsmanship. If you can draw a cute doodle, you can design a kawaii character.
How long until I can make a good character?
Most dedicated beginners produce a genuinely cute, complete character within 1-3 months of regular practice. The style’s simplicity is doing you a favor here; realistic 3D takes years, kawaii takes months.
Can I make money with kawaii 3D?
Yes: game assets, VTuber models, stickers and merch, commissions, and 3D printing. The style is commercially hot and the skill ceiling for “good enough to sell” is reachable. When you are ready, read how to turn learning into income to plan the business side, and take inspiration from self-taught creators like the ones in this designer journey story.
Kawaii 3D is the rare skill where the beginner-friendly version is the real thing, not a watered-down demo. The characters professionals sell are built from the same spheres and modifiers you will learn in week one. Start with the gray cube. End with something adorable.